I have an idea for a next “chapter” in my project : prepared computers or assemblages.
Each computer would be a hodge-podge of different tech from different eras, but would each include some kind of I/O, memory, ALU, and display, cooling. I could return to the e-waste side of things, but still make circuits to control them.
I could use a corps exquis method to combine different types of screens/displays :
- mini CRT
- LCD
- projector
- printer
- e-ink
- galvo lasers
Types of memory :
- floppy
- SRAM
- DDR
- CD
- Tape
ALU :
- FPGA
- microcontroller
- raspberry pi
- mechanical
I/O :
- mouse
- keyboard
- trackball
- touchpad
- speakers
- internet
Cooling
- Peltier
- Fan
- Radiator
The actual functions of the computers would be unclear, they would generate mysterious images and sequences and react to the interface. They would allow me to very clearly be in the practice of making art.
They would highlight what I’ve come to find interesting about the world of computers, the hand-madeness and social dimension of the objects. Each would be unique, idiosyncratic, and I would no longer be in the situation of working with screens and not knowing what exactly the “object” is. The object here would be clear, it would be the computer assemblage. I could revisit my obsession with miniatureness, and oddity in these hybrid “monsters”. They would also require lots of technical challenges to make work, and would not produce waste like the mass production of circuit boards does when making a kit.
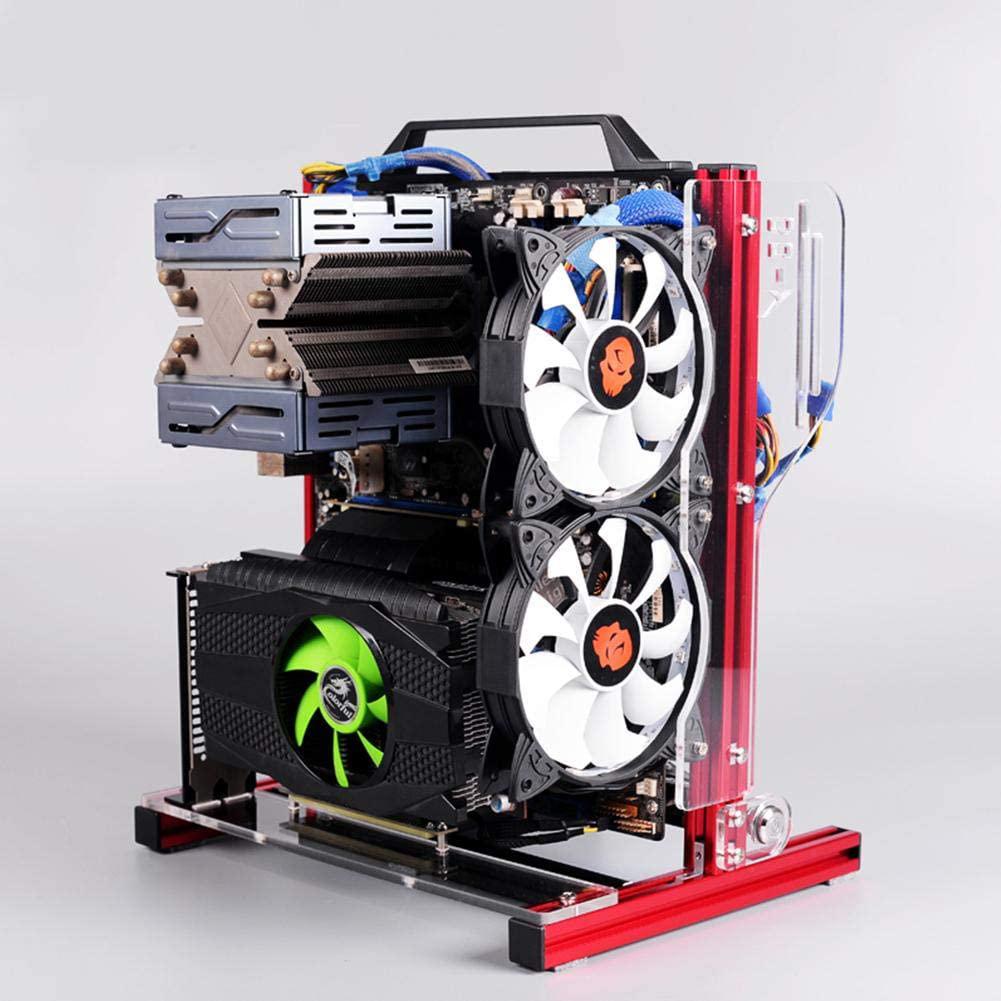
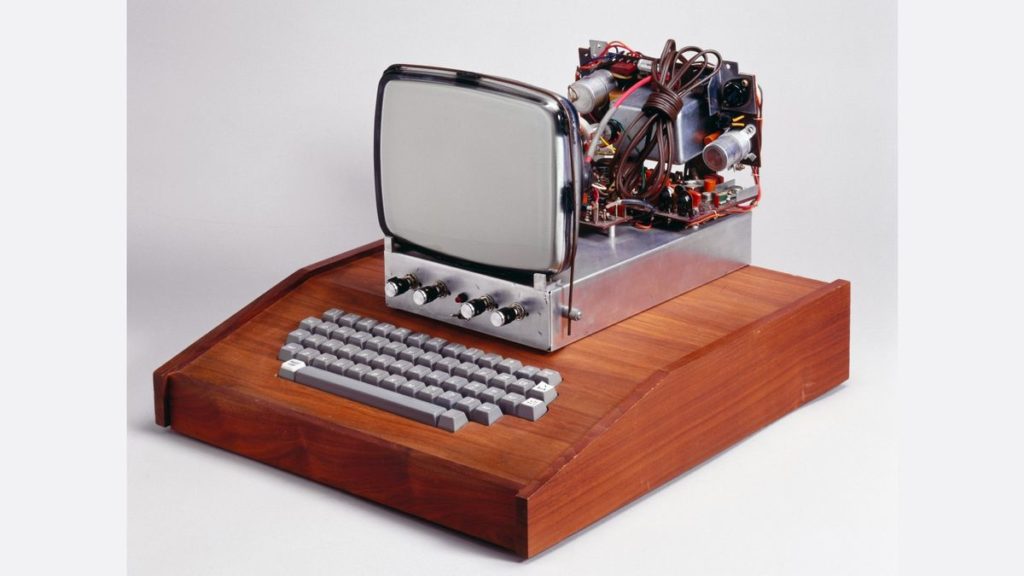
This is building on Vivien’s idea to be inspired by full computer builds to emphasize materiality :
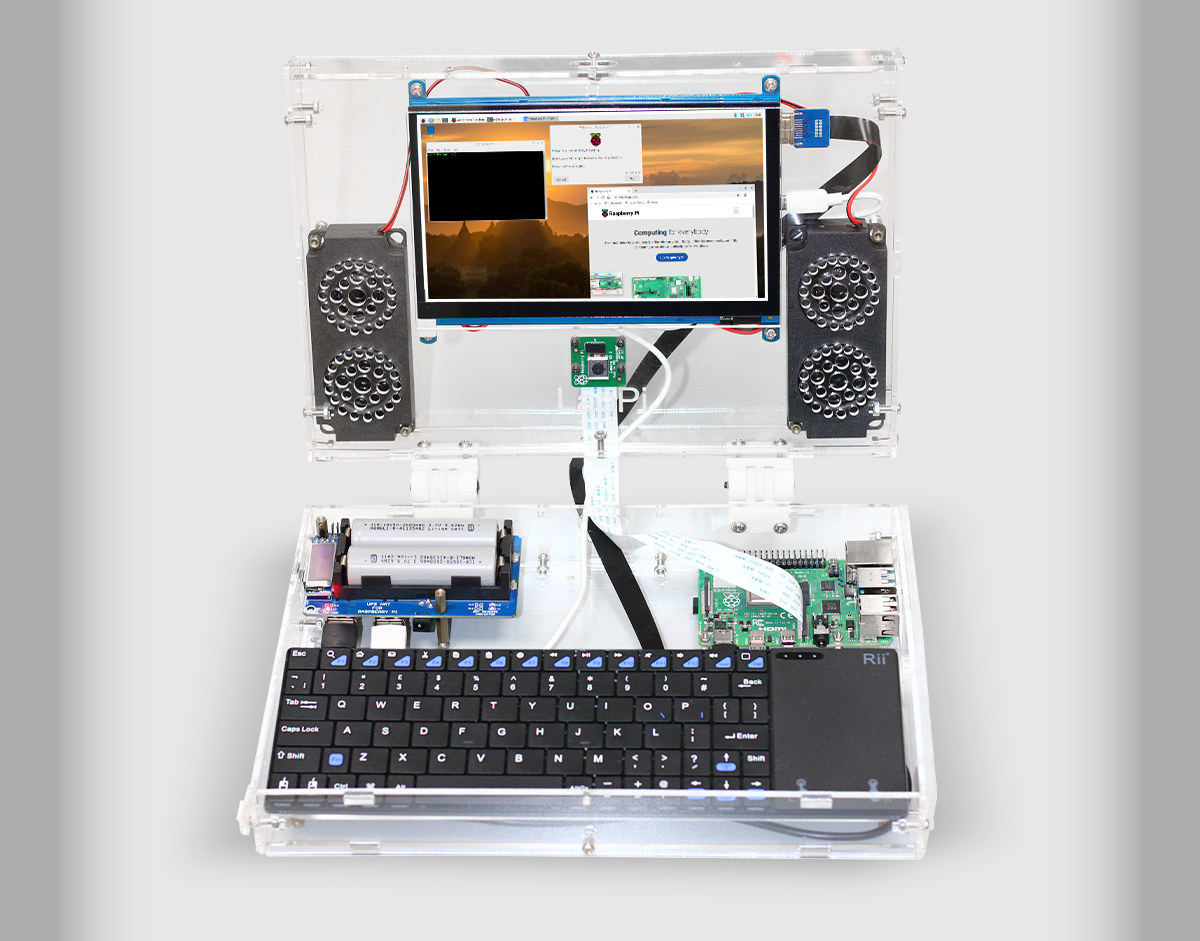
It would be really cool to make everything from e-waste, but also to keep the miniature dimensions. It looks like phone screens from Nokia can be controlled by Arduino, but that others are undocumented and hard to control without finding a datasheet :

Some ressources for controlling a TFT display directly with Arduino :
https://community.element14.com/members-area/personalblogs/b/blog/posts/screen-success-hack-like-heck-build-update
Looks like it is doable with a raspberry pi and therefore doable with an FPGA.
None of these will be possible if I don’t have an autonomous board though – one that produces it’s own videos with data (instead of relying on video from a computer or rapsberry pi). So I will have to make this work first, and why not try to have this done for the expo next month in Germany ?
******
This Autonomous board could play videos from memory and display it all on the same board, without any wires !

I am now seeing this as a two board construction. The keyboard is too dense to pack any electronics into really, so it is better just as an interface with a ribbon cable going to the board behind the screen which has the FPGA and microcontroller. The bottom could be in aluminium which would make it stable and could have tabs which bend on the edges. This would provide a solid mounting place for the micrometer knob and the laptop hinge. It would also give a different look to the board as it would be all metal, combining with the micrometer, the screen and the screen hinge to make an all metal looking assemblage.
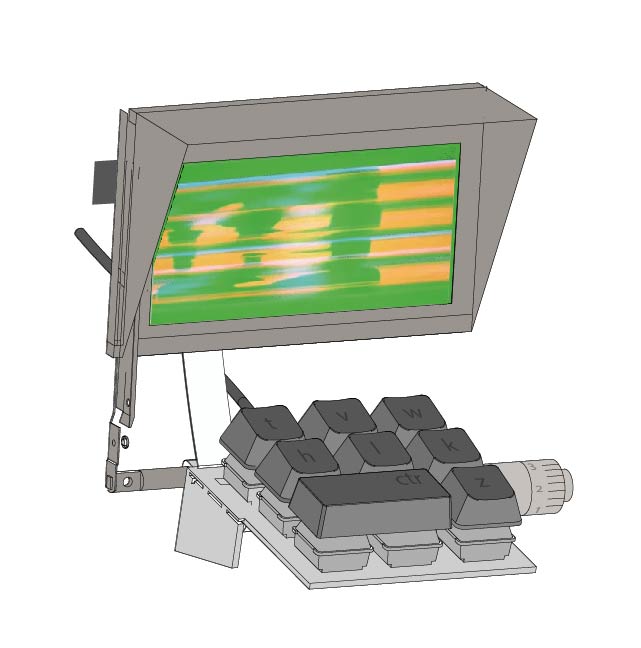
Not yet sure how to convert the linear motion of the micrometer knob, and I feel that the screen + board might look and be a little top heavy / too thick for the effect.
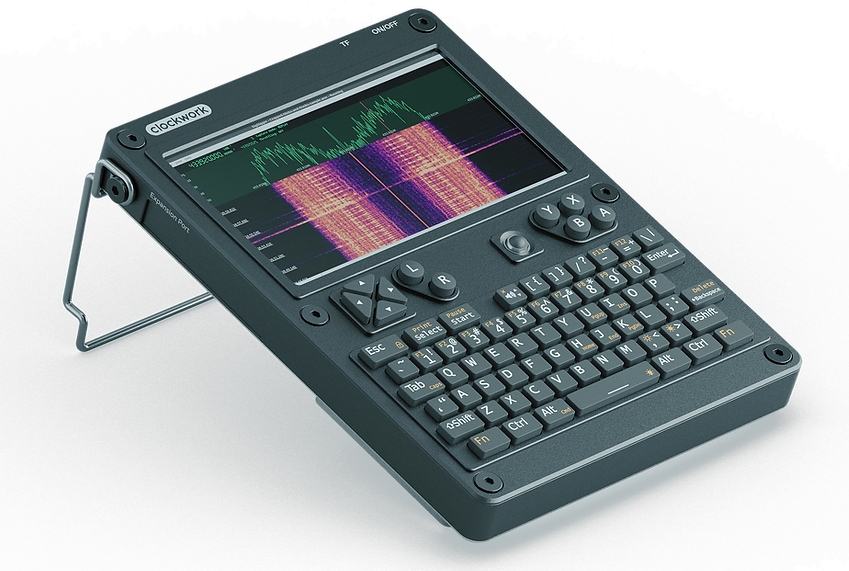
Check out these beautiful machines from Love Hulten : https://www.lovehulten.com/ Thanks Martin De bie for the ref !
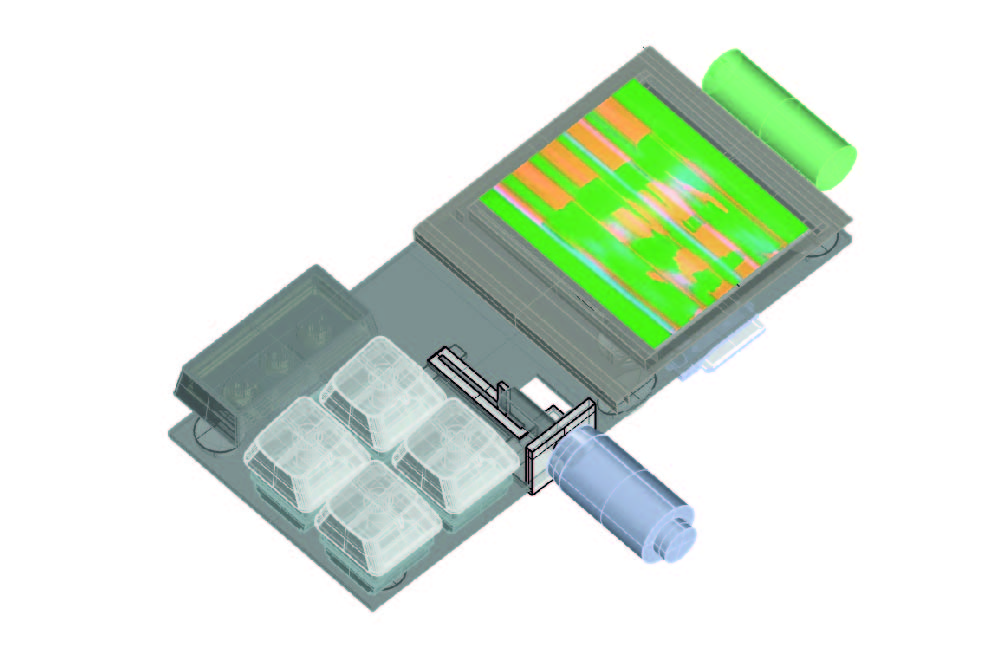
Now I’m thinking it should be flat in fact :
Looking in to TFT LCDs, here’s what I’m finding :
- 40 pins seems to be a kind of standard
- There seems to be at least two modes : ‘RGB’ mode and SPI mode.
- rectangular screens with 800×480 in 4.3″, 5″ or 7″ seems to be standard
- TFTs seem to come with a driver chip like the ILI9341 or the ST7701S
- Some seem to require being initialized by SPI
*****
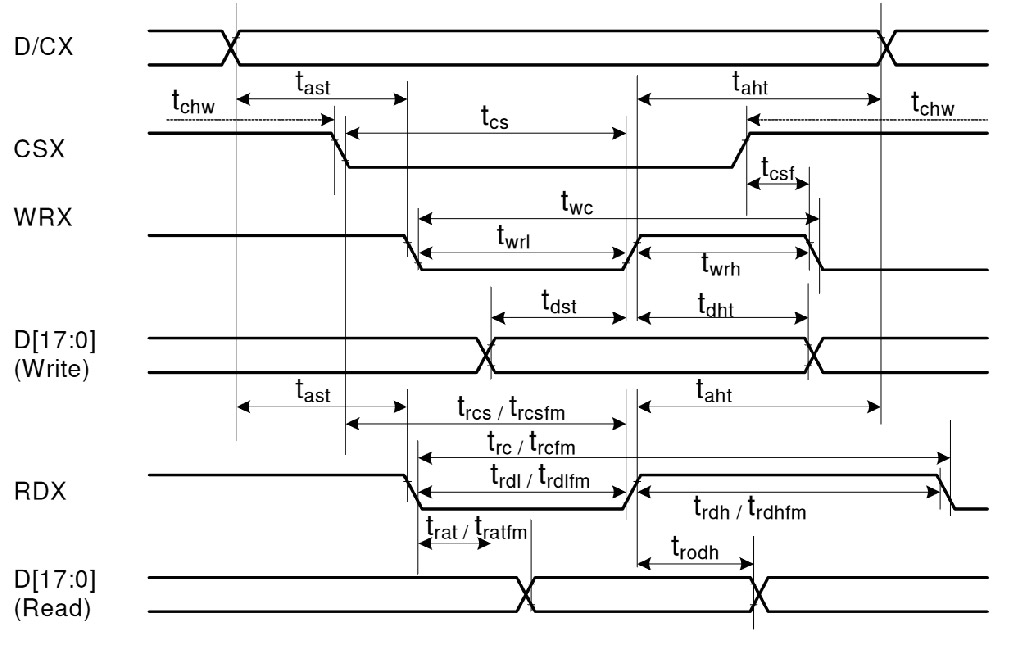
Kristy has helped me select a nice sized screen, 2.8″ seems to be cute but not trinket-like. Adafruit’s screen sells on Mouser : https://www.adafruit.com/product/1774
It appears to have a simple 8 bit parallel mode by default with a straight-forward timing diagram :
And here’s another explanation of the same thing showing two different options :
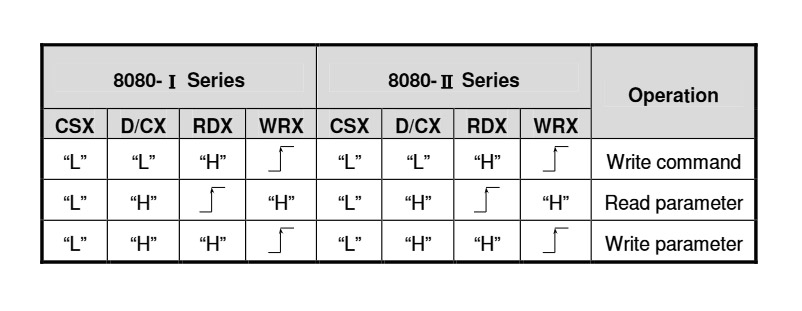
The datasheet is detailed and I have Adafruit code to base things on as well.
****
The screen also appears to also have a “raw” Parallel RGB Interface mode which seems to involve the HSYNC, VSYNC, DOTCLOCK, DE, while sending color data to the D pins…..but it looks like first bits (RCM, RIM, and DPI) must be set from the SPI mode ? Also, it looks like you have to calculate yourself the timings of the screen based on the clock and screen dimensions (and also set these bits (DIV, RTN, etc.) ? But it looks super simple afterward :
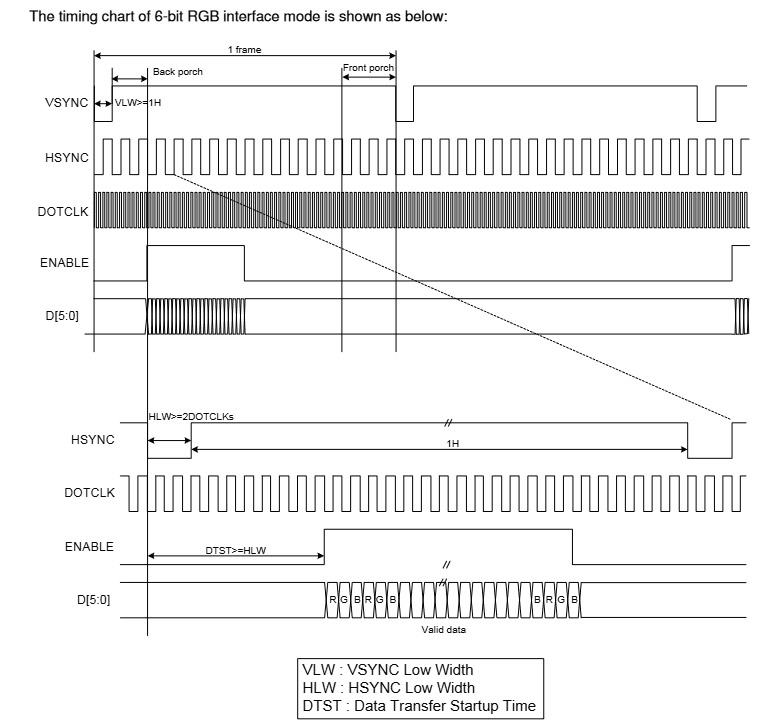
*************
PROJECT UPDATE :
This project seems to be unlucky :
- My Mouser order was stolen from inside my building or was never actually delivered.
- The idea of having doublesided PCB + aluminum went out the window when I saw the cost (approx. 10x a normal PCB)
- The replacement screen I ordered from Amazon has only 20 connections (instead of 50) and only allows SPI, which is very difficult for the FPGA to do and so would require a microchip + FPGA teamwork which seems technically a real headache.
- Currently the HX4K is not starting up, despite having both PLLs connected now. I’m not sure what I’m missing but it is different enough from the HX1K to merit more research before using I guess.
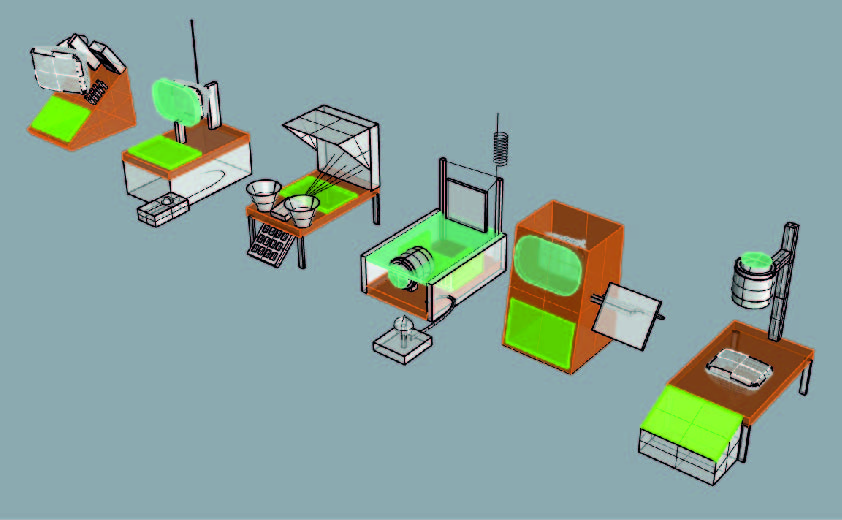
On the other hand I have been preparing for my ESDAC creative coding class and enjoying learning about the different kinds of P5JS codes that exist. I made an image to show the typologies I found so far :
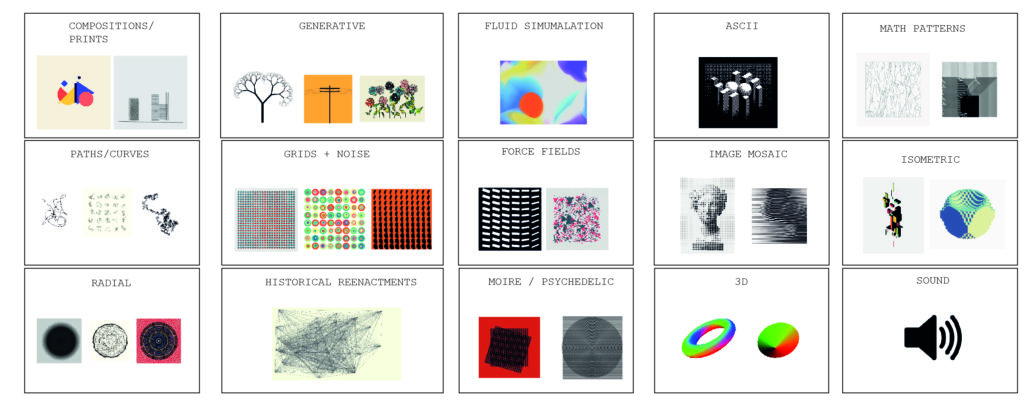
I should also have a class on Glitching !!! And on WEBGL Shader, check out this awesome book : https://thebookofshaders.com/03/
Moiré
Field
Random walk
Spirograph
Cavegen
Radial
Hyper-realistic face generation
**********
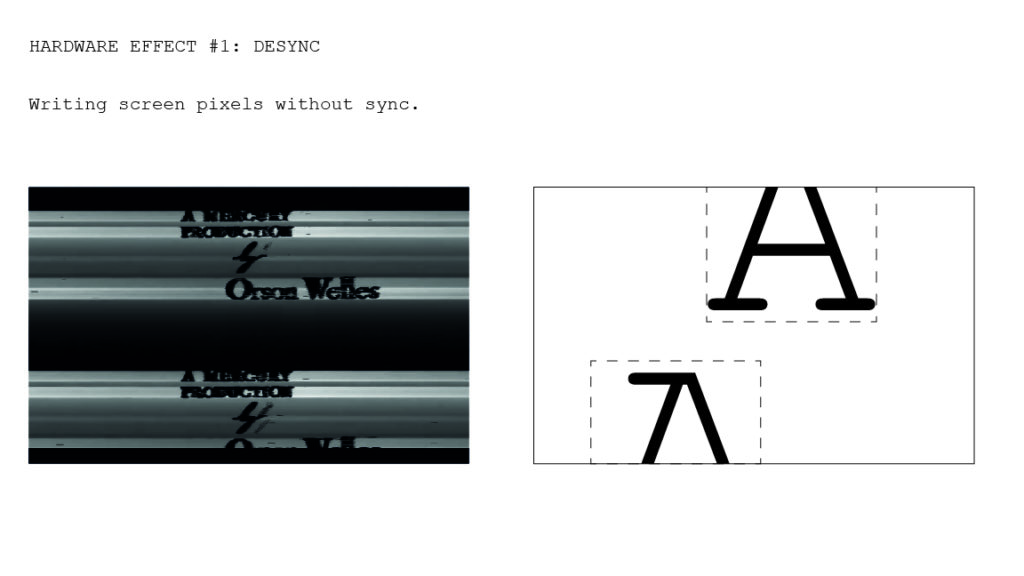
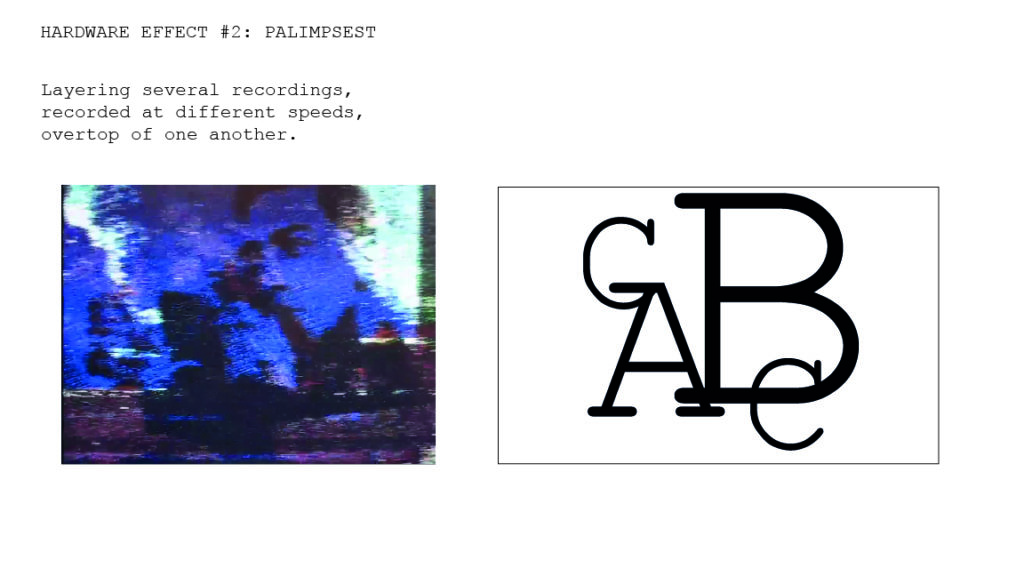
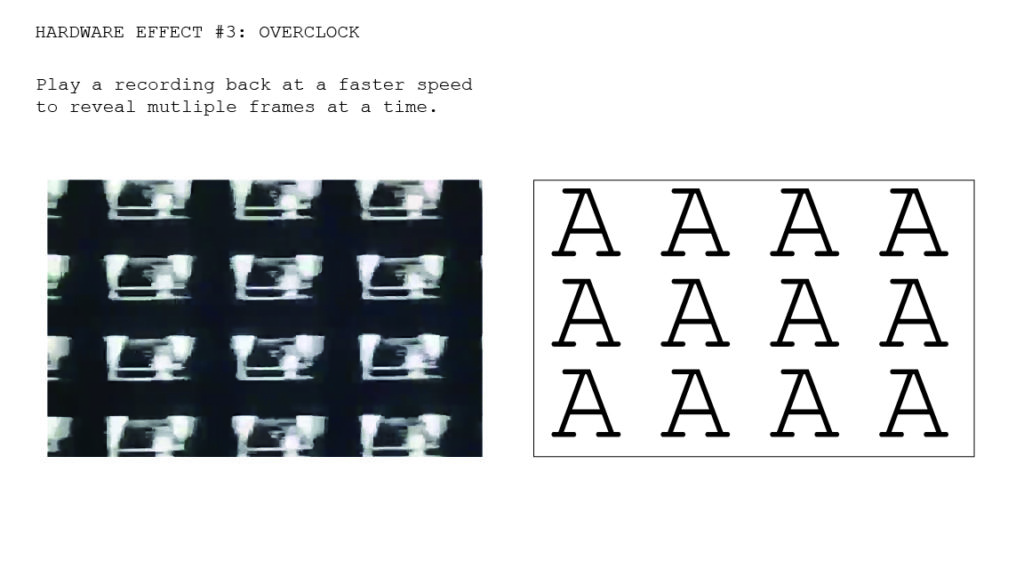
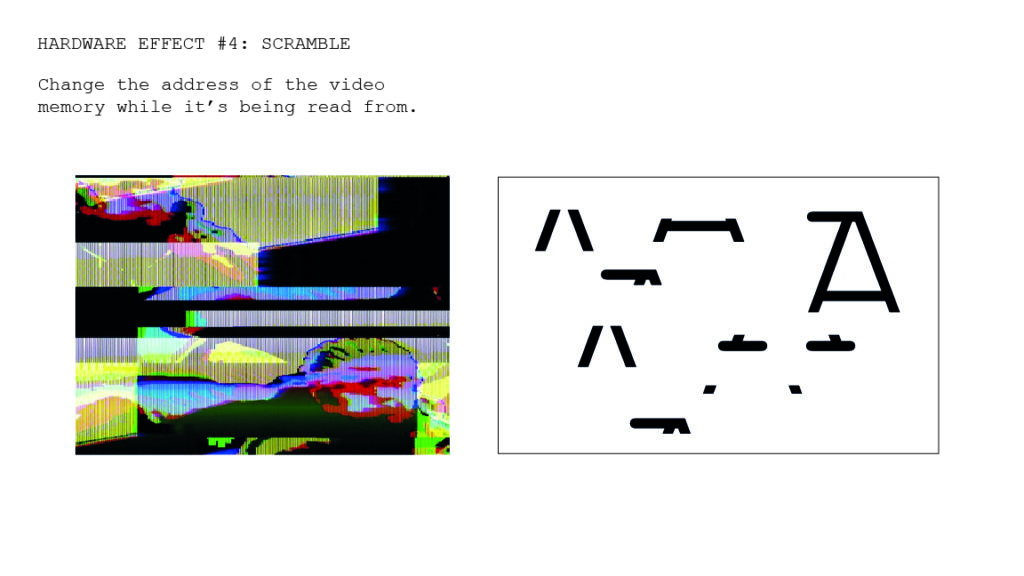
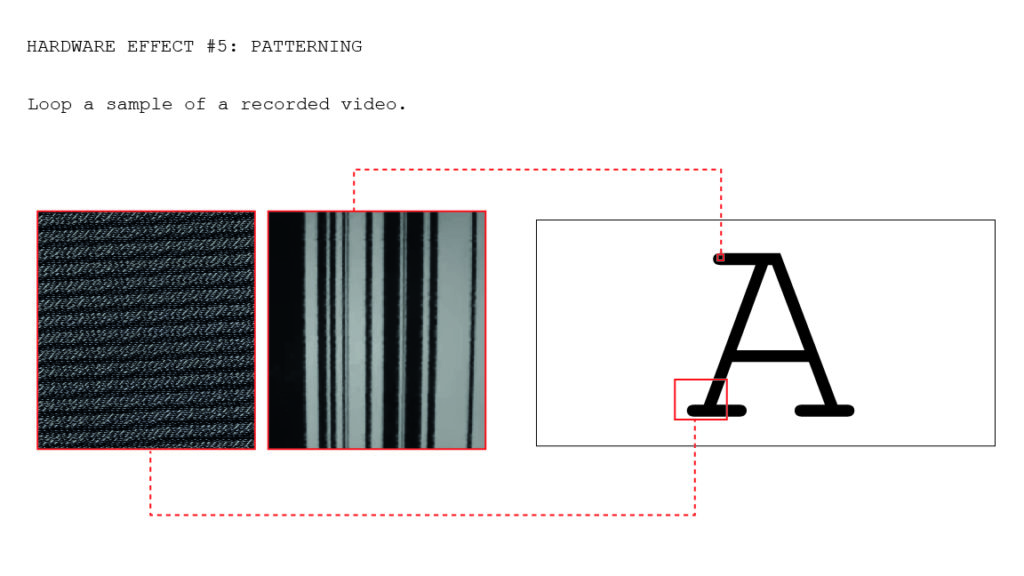
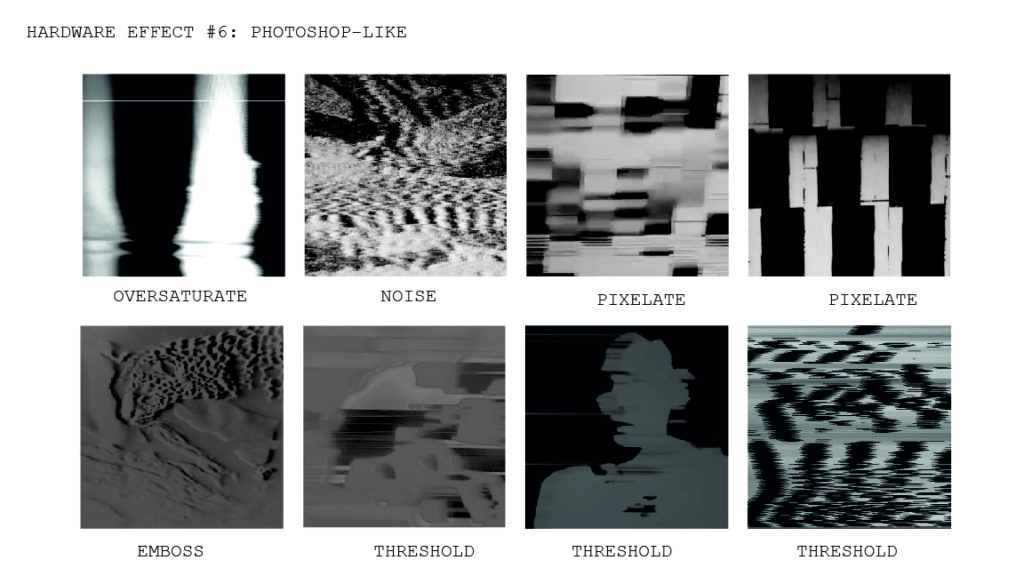
Trying to put together an analysis of the kind of hardware effects I have been producing so far :

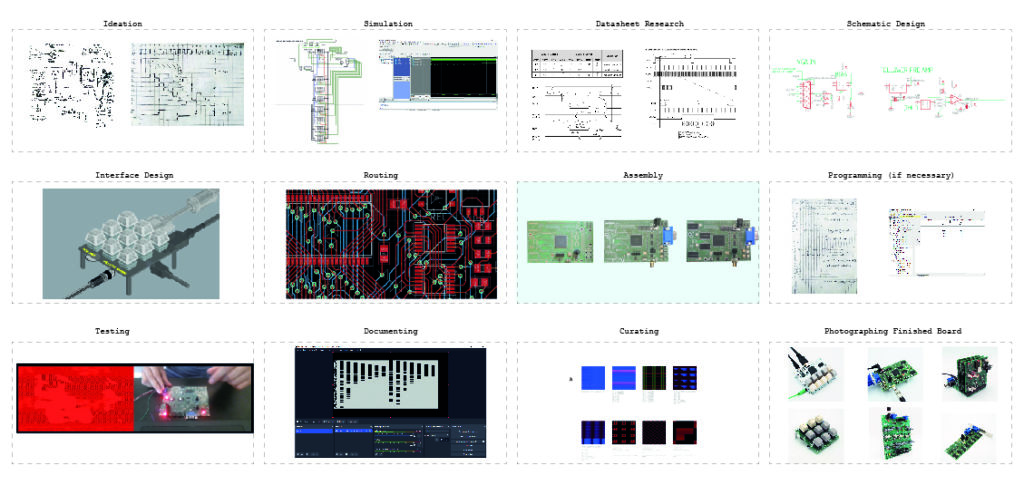
Here is a slide trying to show the process of designing a board :
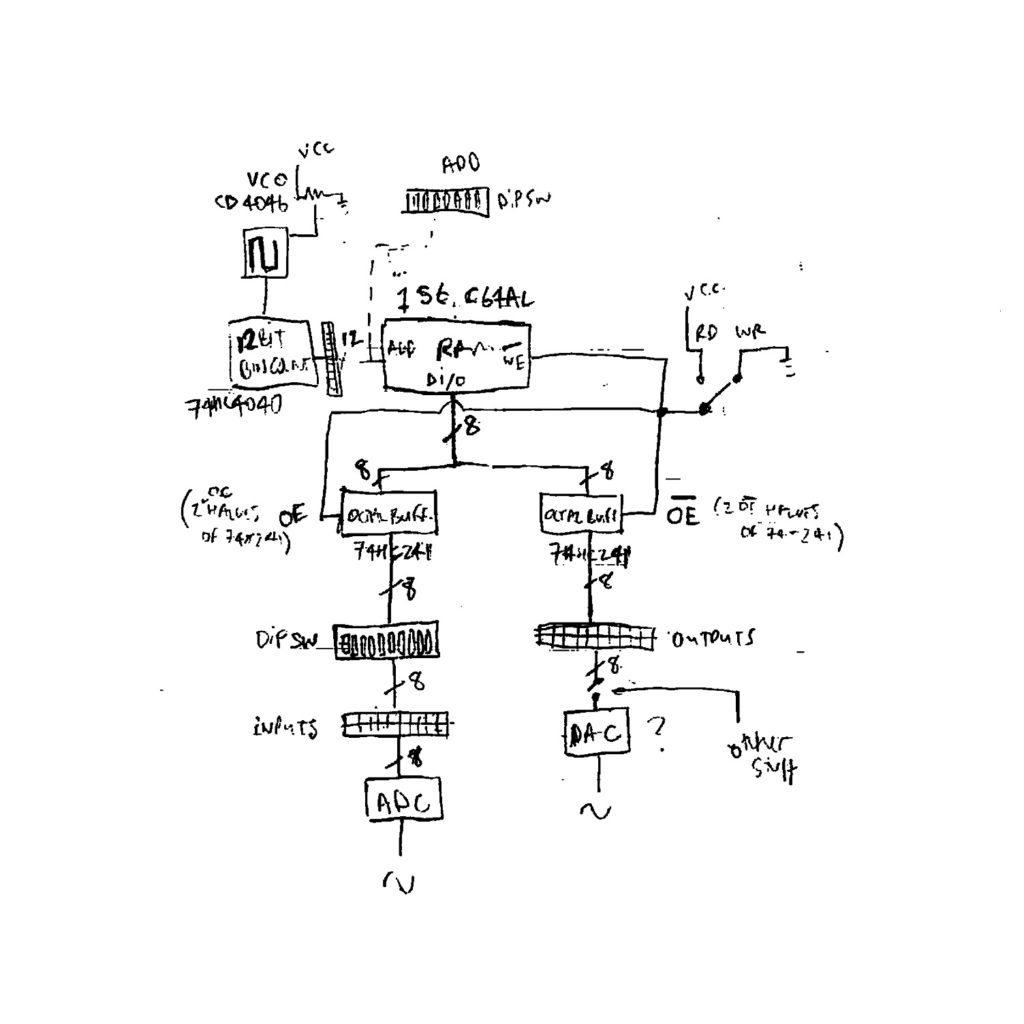
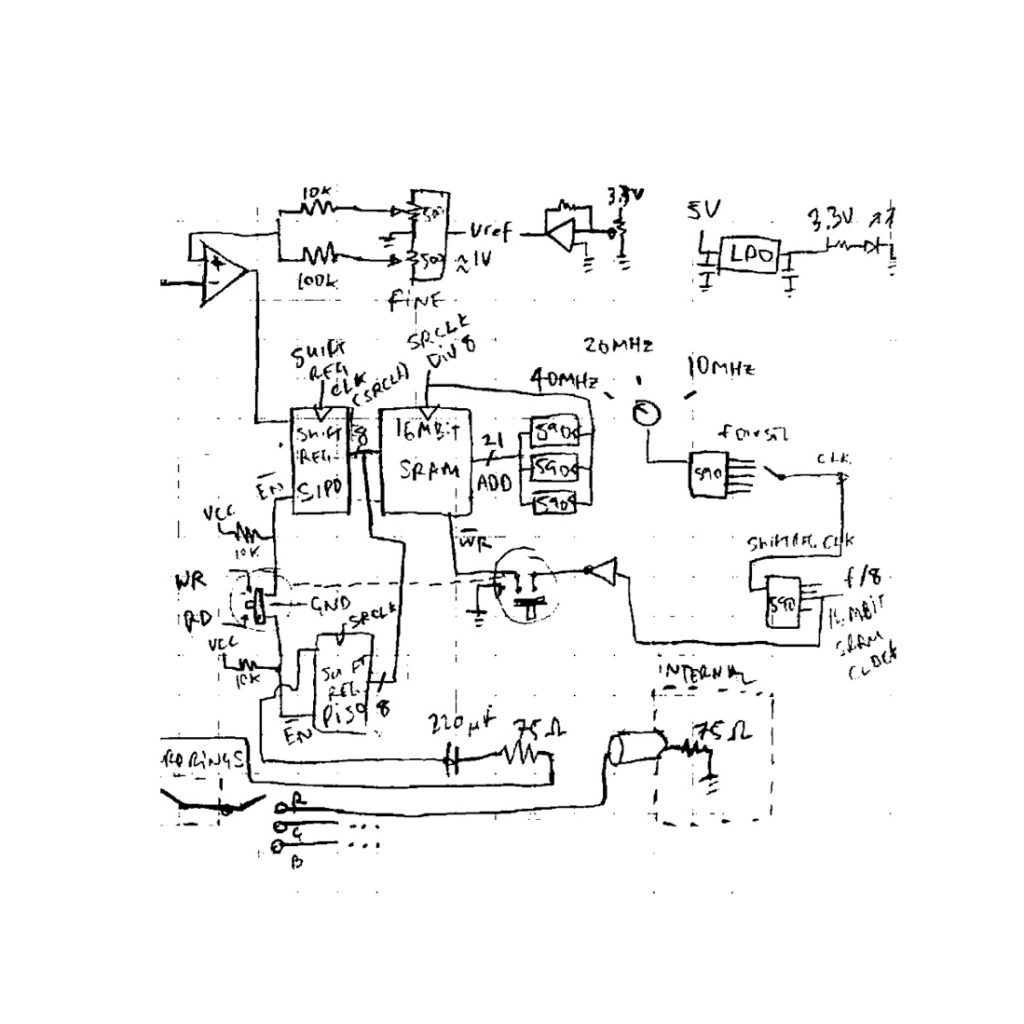
And some sketches of circuits I’ve made over the course of the project :

****
Older board I never photographed :
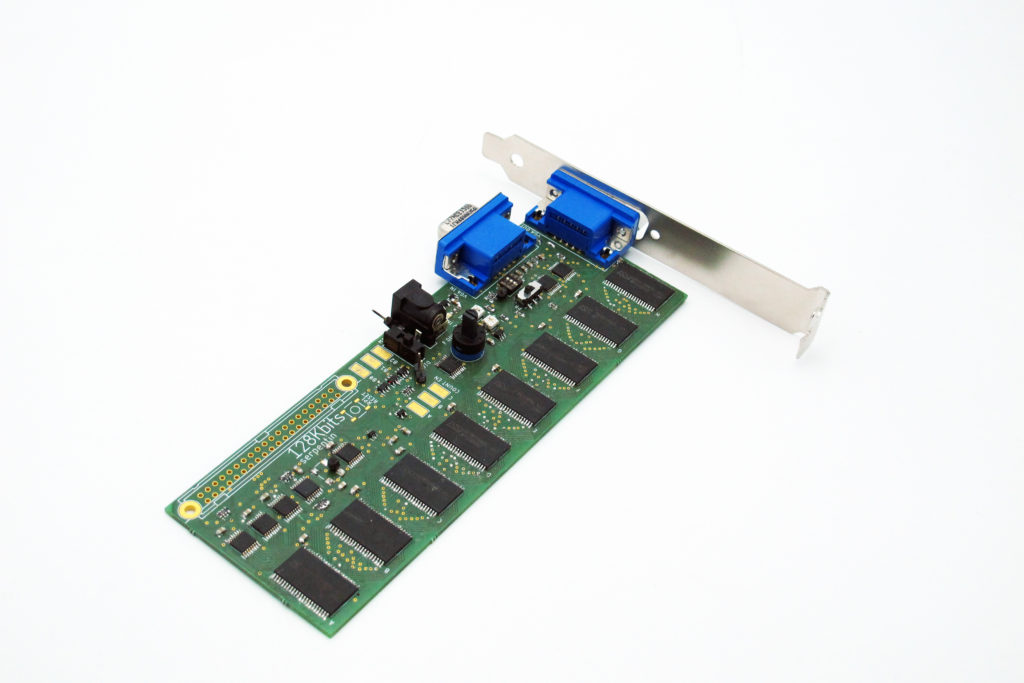
****
I finally have access to opencores.org ! Some things of interest so far :
- Math – https://opencores.org/projects/verilog_fixed_point_math_library
- Noise and PRNG – https://opencores.org/projects/gng
- CORDIC core (for trig functions) – https://opencores.org/projects/verilog_cordic_core
- ATTINY core – https://opencores.org/projects/attiny_atmega_xmega_core
There is plenty more, like H.264 and JPEG decoding, SoC, sorting algorithms, DDR controllers, Real-time clocks, PCI bus controllers, DSP Filters, SD card controllers, SPI/UART/USB/I2C etc interfaces, etc.
****
Some aesthetic references I was reminded of this week :
- The fractal, “trippy”, spaceship-like camera movements, and kaleidescopic winamp visuals : https://www.youtube.com/watch?v=RBkhUg1oVIE

- The black and white retro dithering from Return Of The Obra Dinn https://www.youtube.com/watch?v=k2y5qH2Jn14
*************
Post Darmstadt workshop thoughts :
- CNC building workshops are hard. In the Fab Academy it takes an entire team two weeks. My two attempts, a while back at CMU and in Germany this week were too ambitious. If I want to have everyone leave with a working machine I need to do a lot of prep before hand. This weekend I could have 3D printed parts before hand that clipped together in the spirit of my linear actuators for the Fab Ac (https://www.marrs.io/medium-sized-cnc-foam-cutter-with-leon-reboul/). Alternatively I could have bought a cheap drawing kit from Aliexpress for around 100 euros if I had gotten myself organized early enough. I think threaded rods may also be a better solution than belt drives which require more skill to design with. The linear rails were cool but they required special low-profile screws so the students struggled a bit with this. It also seems to be the case that servos can simply replace all the challenges of stepper motors requiring drivers for everyone but experts. Essentially : Don’t overthink it, do the most obvious tech thing that is the shortest path for beginners. This will be my strategy for the Beaux Arts workshop coming up where I’ll focus on servos only.
- I should probably keep in mind the challenge of the workshop. The higher the challenge for the participants, the more work I need to do to prepare everything. More plug and play = less challenge.
- Learning to be a free lancer will take time but I need to consider myself as a professional, not doing things on a shoestring budget and exhausting myself. As I move around and workshop in different places, I need to keep in mind my audience – engineering students are different from artists, designers, enthusiasts and kids.
- It might be cool to learn to make video PDFs for future presentations when talking about video synthesis. Also maybe live coding with toy shader / P5JS to illustrate things ?
- For the expo, I was happy to have a plug and play FPGA solution that just generated images. The boards I have made that record video all need heavy intervention on the part of the player and are not intuitive at all. I am still hoping to find a way to order the remaining parts from Mouser soon so I can test SD card reading and FPGA screen displaying.
- For my talk, I still don’t have a way of directly connecting my earlier projects with the new video synth project.
Next steps :
I am feeling positively about just following my interests, and not necessarily knowing where I am going with this project. I want to :
- make abstract generating form code with FPGA using the new trig functions, multiplication and division from opencores !
- experiment with more filters using the FPGA.
- move beyond my current aesthetic, which will require making the recorded image not jump around. I should be able to do this pretty easily when the FPGA is sending the sync signals.
*************
Post BA workshop thoughts :
- The students this time were really into following a more formal series of prepared slides with exercises, and seemed less interested in building their own drawing machines. The Arduino exercises were well received, as well as the glitch exercise, and also the soldering workshop. I like that they bring their own projects and integrate them.
- I tried to be extra professional this time, staying late with students to continue helping them, being extra careful to put everything back in its proper place, and generally being as uncompromising as possible in the quality I’m trying to bring to the workshop.
- My little polyphonic synth, portable speaker, and VGA arduino board were a good thing to bring. I should have something interactive that puts images on the screen I think and a lamp to show off the solar sunflower too.
- I had too many projects to manage in parallel at one point and was rushing about everywhere. Not sure what the solution is there, there were around 8/9 people for the first two days.
- We need some basic boards like mic amp, speaker amp, easy stepper motor drivers, relay boards, etc. that are useful at the BD.
- Vincent was suggesting that we think of ways of creating a virtual expo space for digital works somehow in relation to his radio station at the school which is appreciated.
*************
Post website being down, looking at previous pages now and having some perspective thoughts :
- pure p5js coding I find far less exciting than hardware visual effects, it’s all too immediate and mediated. It’s not raw and unstable like analogue. I think I’m more convinced that the painful process of doing simple things the hardest way possible is actually productive creatively for the friction it affords.
- Putting a series of bitmaps on an SD card (possibly with a custom FFMPEG running on raspberry pi) and then onto the screen would be cool. The idea for a custom FFMPEG comes from this tutorial http://dranger.com/ffmpeg/tutorial01.html which I found here https://github.com/codecrafters-io/build-your-own-x which I in turn found on reddit FREE MEDIA HECK YES
- I need to get the sync working to test some other (less jarring) visual experiences.
- The Real Time Corrupter methods (piping, etc.) are brilliant and I have to copy them to experiment with FPGA memory filters. Beyond the RTC it would be very cool to experiment with DCT compression filter spectra.
- I don’t think I need to look under each hole and check under each rock. Getting one type of memory working, and one video protocol, is good enough and I don’t need to suffer with DDR and HDMI in this way of working I’m assuming currently.
- For marketing video synths, there is the website php like Marc did (https://muca.cc/fr) or the instagram/facebook marketplace option. Alternatively there are services that host the payment side of things like gumroad, prestashop, and wordpress https://wordpress.com/fr/ecommerce/
- I’m doing NO SCHOOL this summer !! Planning on getting a simple FPGA v synth programmable with Arduino / RPI in python and made on an aluminum-backed board (with SMD VGA).
*************
Learned about live coding with hydra :
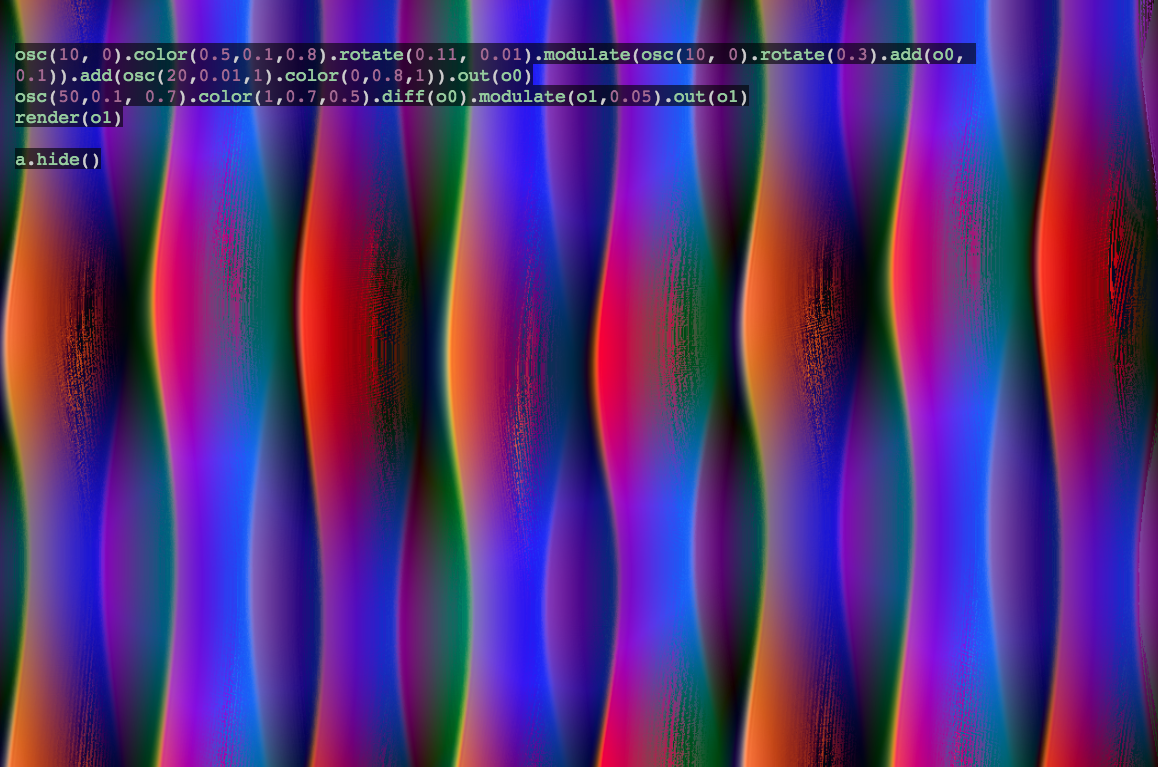 I will be VJing this month, we’ll see what that experience is like. Perhaps it will help me design boards that VJs could use. Here’s what I learned :
- The stress of doing a live performance when everything isn’t set up and rehearsed many times before hand is high. One would need to have a bunch of backups, and a very rehearsed performance to lower stress.
- Having a small lamp is helpful to see what connections and knobs you are messing with
- One question is how to react to music, does a beat equal a varying of a parameter ? How to react to song changes ?
- How should “effects” be introduced ? I defaulted towards starting simple and then going towards the more complex effects
- Clearly having performance grade equipment means everything is super robust, easy to use, etc. This makes me think that it would make sense to make a really reliable simple filter, for instance. This also connects with a larger issue for me : I want to do things differently but there are often good reasons why things are done a particular way…
- Sending my crazy VGA to a machine that digitizes it and sends it on as HDMI is probably safer than directly sending things to the projector…
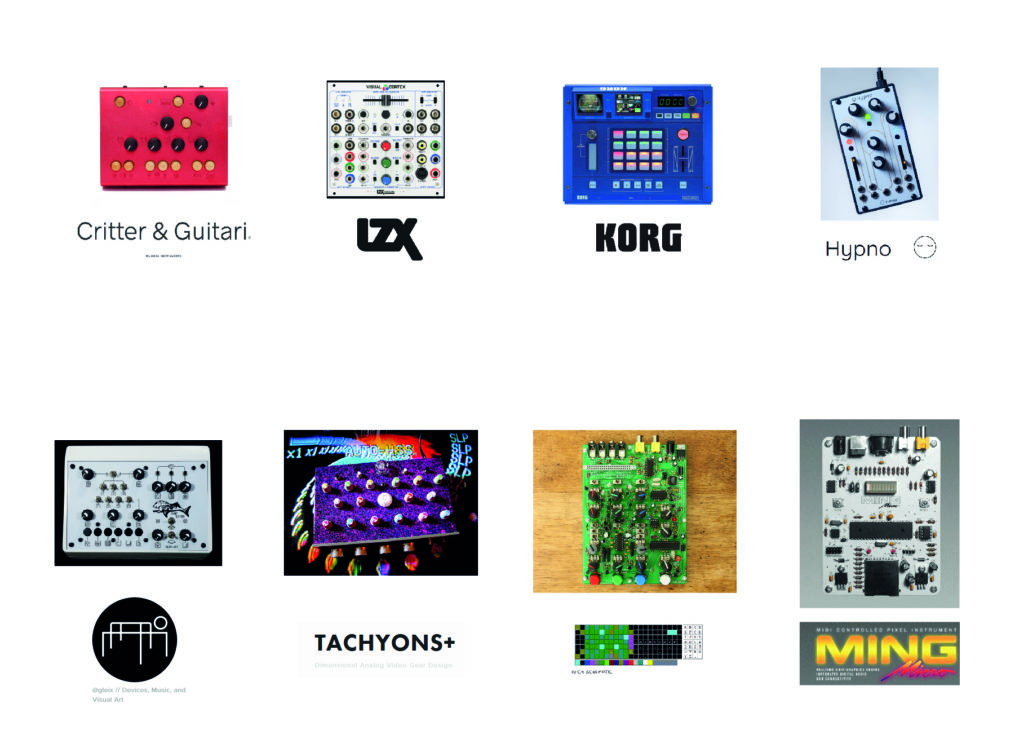
I want to use an older media device (cassette tape, floppy, mini-VHS?) in my next board. I realized that if my practice is about “doing things the hard way”, that should be visually communicated in the design (no one understands if the electronics are done the hard way or not…). This would also signal that I am not trying to make cutting edge new things but that my interests are elsewhere.
Here is a first look at some video synth companies and their designs :
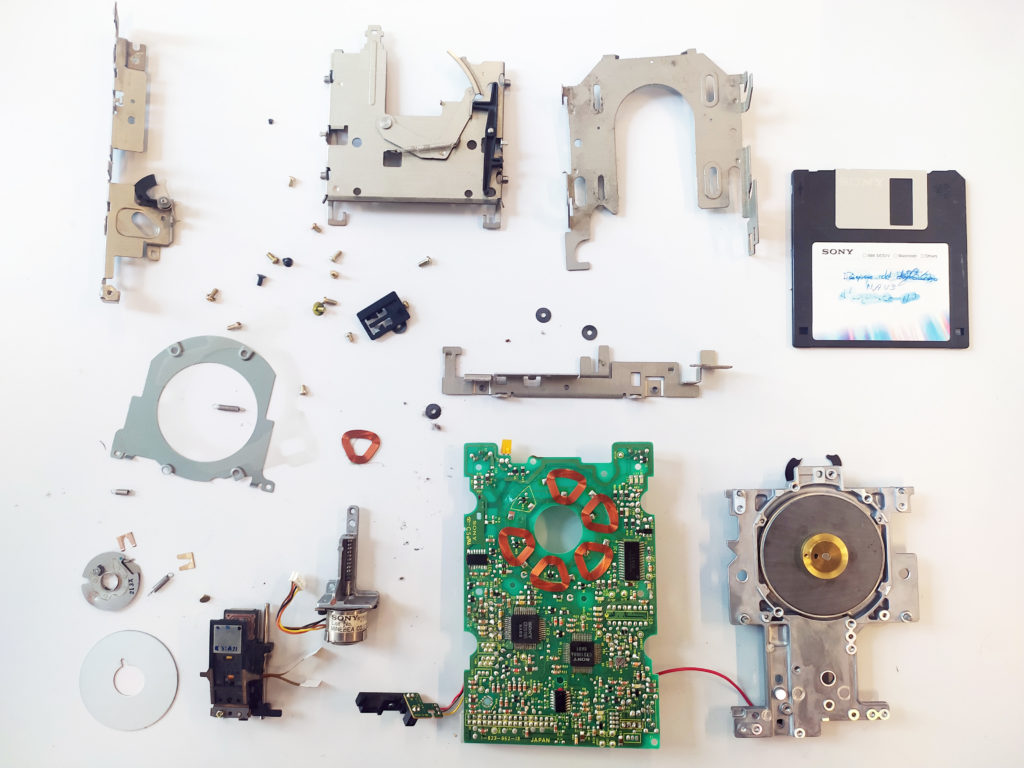
Trying again with the floppy drive :
Check out this video extracting motion from video by just inverting and sliding videos sideways :
****************
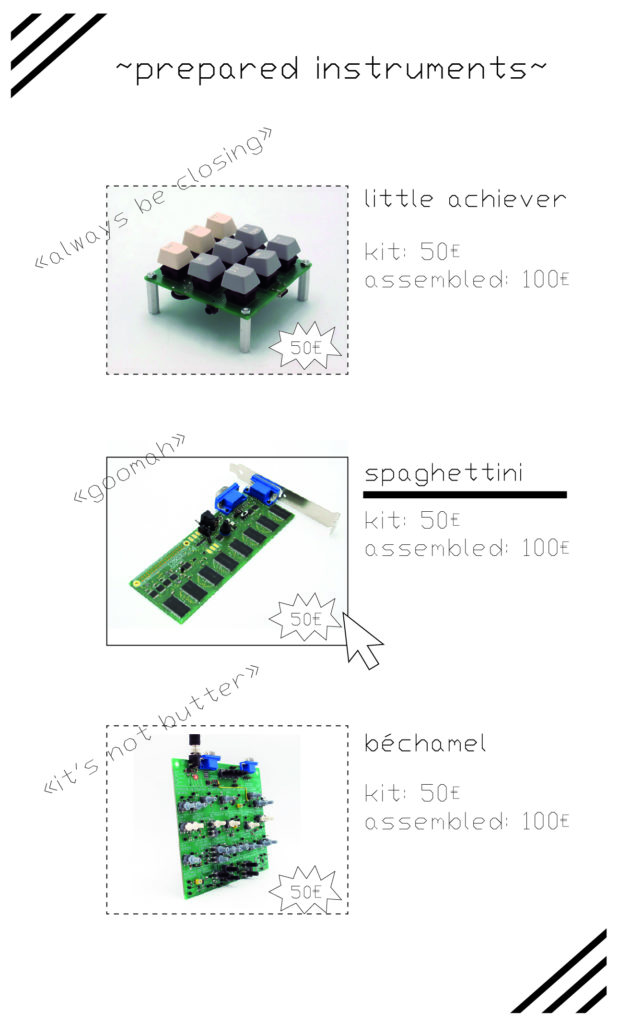
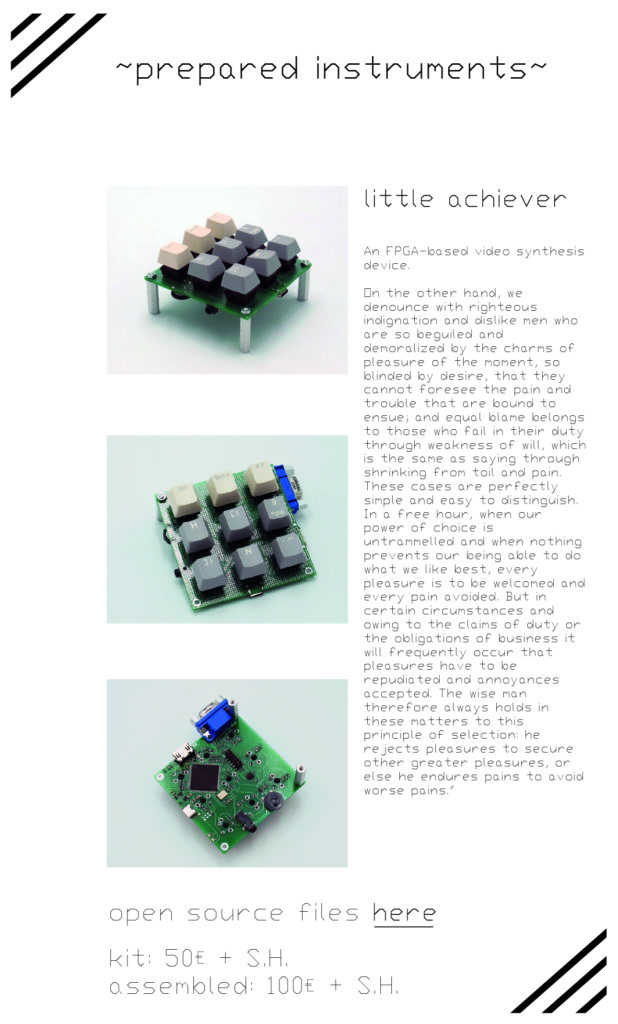
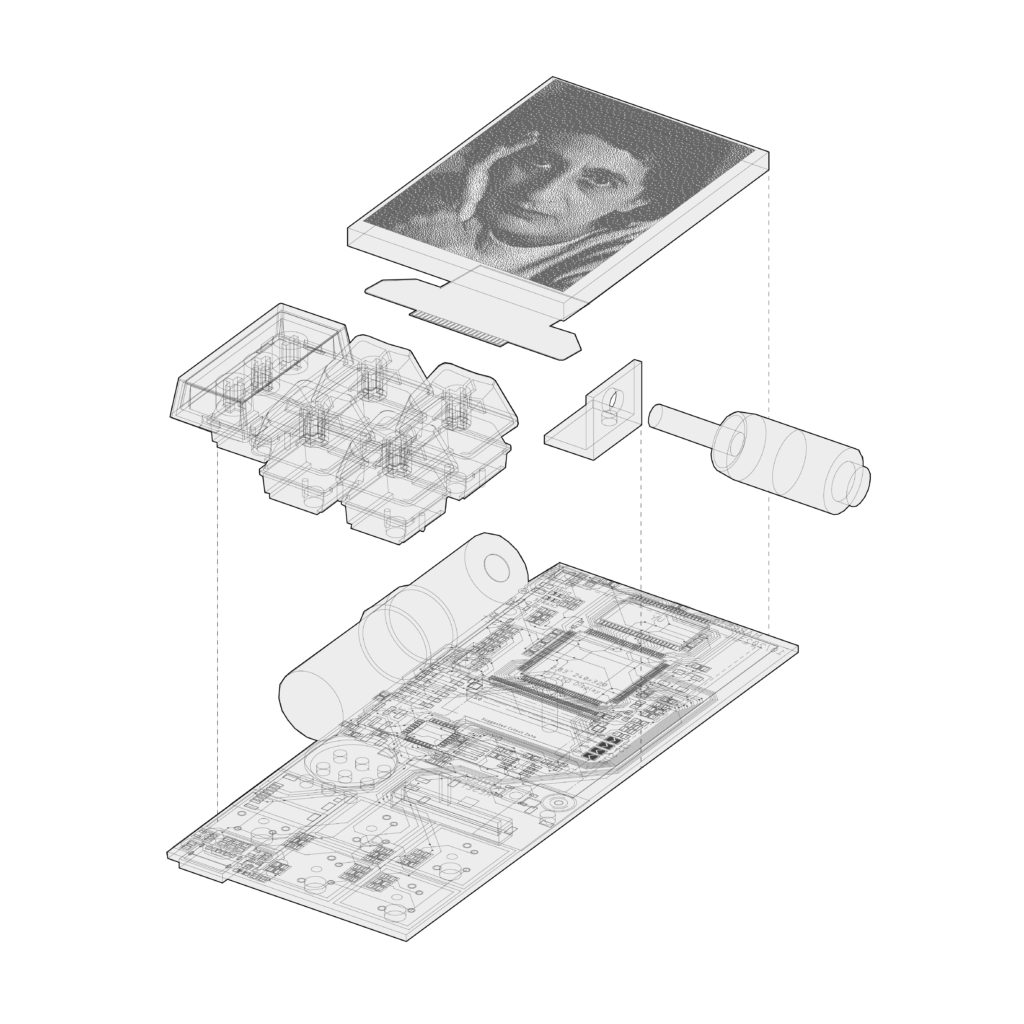
I finally bought preparedinstruments.com ! Here are some potential designs for the page :